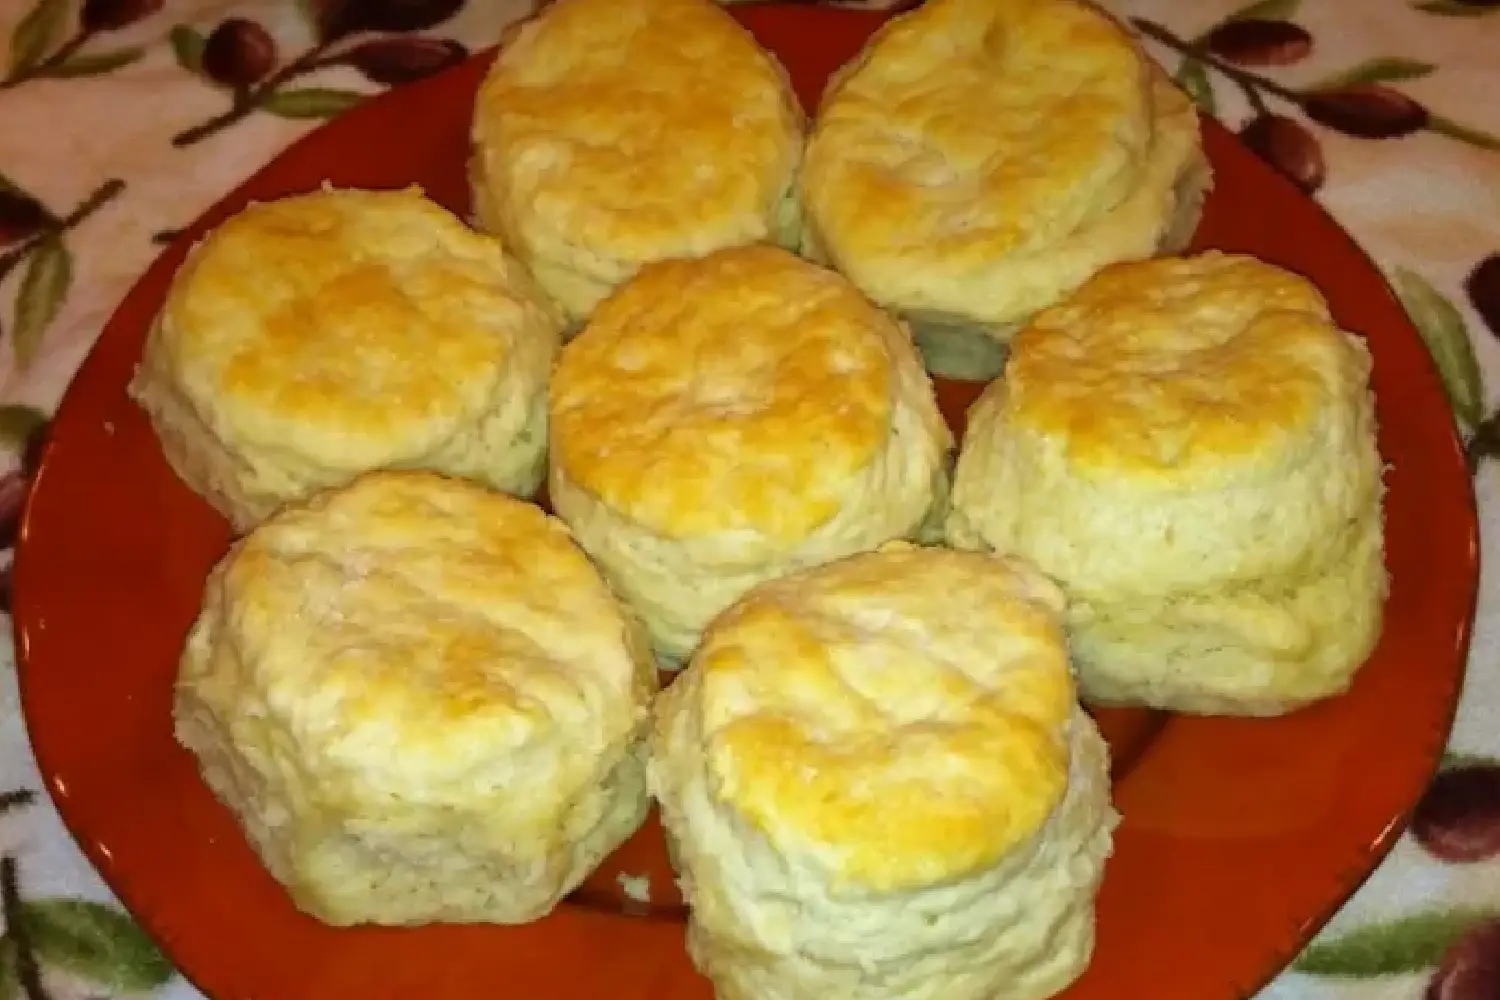

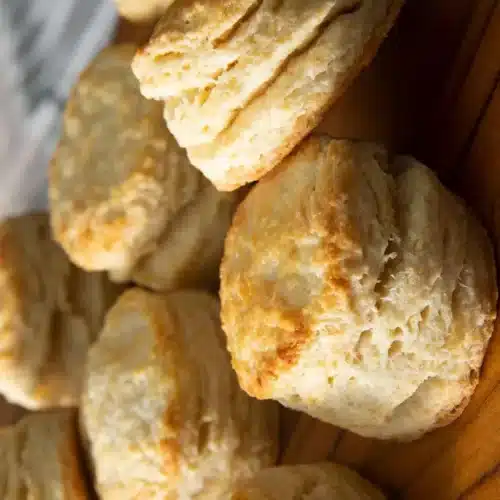
Prepare yourself for an extraordinary encounter with these easy buttermilk biscuits. Prepare to be astounded by their unmatched softness, towering height, flakiness, and sheer buttery goodness. These tasty treats are perfect with jam or gravy, making them the best choice for an easy breakfast!
Embarking on the journey of crafting buttermilk biscuits from scratch is an endeavor that may seem daunting at first. However, fret not, for it merely demands seven humble ingredients and a modicum of effort—just a pinch!
Get ready to learn something new! Once you discover how easy it is to make your own biscuits, you’ll never want to buy pre-made ones again.
Prepare to be captivated by the incredible versatility bestowed upon this buttermilk biscuit recipe. Enhance your biscuits with a selection of delightful toppings such as sausage gravy, jam, marmalade, butter, or honey.
Prepare to be captivated by the sheer enchantment of these delightful cookies, regardless of your chosen decorating style!
A Mosaic of Ingredients :
Enthralling buttermilk biscuits can be conjured with a mere seven fundamental ingredients. Hence, it is of utmost importance that you meticulously procure the exact components required for this easy biscuit recipe:
- When using all-purpose flour, it’s important to be precise in your measurements. Spoon and level the flour instead of recklessly scooping it directly from the bag. To avoid accidentally making too many dry, dense biscuits, use this careful approach.
- Baking powder & baking soda: Prioritize the freshness of your baking powder and baking soda, as both play pivotal roles in achieving a resplendent rise.
- Don’t worry, adding granulated sugar to the biscuits doesn’t make them overly sweet. Instead, it adds a gentle hint of flavor.
- Salt: This humble addition imbues the biscuits with a savory essence, amplifying their buttery charm.
- To make better biscuits, use cold butter. If the butter is warm, the biscuits won’t rise properly in the oven and won’t be as flaky and impressive.
- Buttermilk helps baked goods rise because it is acidic and reacts with baking soda. The outcome? Super soft biscuits that will make a lasting impression on your taste buds. For optimal results, the usage of bona fide buttermilk is strongly recommended.
How to Make Buttermilk Biscuits :
Before you start the recipe, remember that cold butter and buttermilk are essential for these amazing biscuits. The process starts by gathering the dry ingredients. Next, retrieve the butter and buttermilk from the refrigerator, ensuring their freshness and maintaining their chilled temperature.
- To prepare this recipe, begin by combining the flour, baking powder, baking soda, sugar, and salt. Place these ingredients in a spacious bowl.
- Please introduce the cold, sliced butter into the mixture of flour. In order to combine the butter with the flour, one has the option of using a fork, pastry cutter, or food processor. The ultimate objective is to achieve small and evenly spread pieces of butter throughout the dry mix. This mixture should also include a few larger chunks to enhance the flavor.
- Introduce the delicious buttermilk. Pour the cold buttermilk into the bowl and gently mix it, encouraging the dough to come together.
- Gently place the growing dough on a floured surface. Then, use your hands to bring its parts together gently.
- Let’s unravel the secrets of folding dough. Shape the dough into a rectangle and then fold it in thirds, like unfolding a letterf. Gently pat the folded creation into a renewed rectangle, repeating this intricate folding process two more times. By executing these folds, you summon forth layers—conduits for ethereal flakiness and aeration. Heed my words, dear companion, this additional endeavor bestows upon the biscuits an unequivocal majesty that transcends the ordinary.
- Coaxing the dough: Upon the completion of the third fold, coax the dough into a proud 1/2-inch thick rectangle. Be mindful of accurate measurements. If the dough is too thin, it won’t rise properly and its size will be smaller.
- Resplendent rounds: Employ a 2.5-inch biscuit cutter, aflutter with a sprinkle of flour, to fashion the biscuits into resplendent rounds. Gracefully arrange these masterpieces upon a sacred parchment paper-lined baking sheet. When cutting biscuits, please avoid twisting the cutter. Twisting could seal the edges of the biscuit and make it difficult to rise. Instead, execute a confident descent, severing the dough with precision and promptly withdrawing the cutter.
- Bring the biscuits close together on a baking sheet, touching each other gently. This will help them rise higher and give them a soft and tender taste.
- Anointing the pinnacle: Bestow a gentle brushstroke of buttermilk upon the summit of each biscuit. This embellishment is optional, but it adds a beautiful golden color to the food when it cooks in the oven.
- Bake these delicious creations in the oven for about 15 to 17 minutes. The oven will work its magic to transform them into perfection.
The Frozen Symphony: Unlocking the Secrets of Buttermilk Biscuits’ Frostbitten Reverie
Indeed, these special biscuits can be kept frozen before and after they are baked.
- To save cookies before baking, line a baking sheet with parchment paper and freeze them solid. Store the frozen biscuits in a large freezer bag for up to three months. When ready to bake, place them directly from frozen, adjusting the baking time slightly if necessary. Cover the top with foil to avoid excessive browning.
- The baked biscuits need to cool down before being stored in a large freezer bag. They settled there, ready to endure three months in the frigid terrain until their fate unfolded. When craving a delightful treat of biscuits, simply remove them from the freezer and allow them to reach room temperature. If desired warmth is preferred, employ either the microwave or a 300°F oven to reheat until they exude comforting warmth once again.
Preserving the Magic: Storage Guidelines
These biscuits are delicious when eaten right away, but don’t worry! You can enjoy their flavor for several days stored in an airtight container at room temperature. To revive their taste, you can either microwave them briefly or warm them gently in a 300°F oven for a few minutes.
For those seeking an extended sojourn within the realm of preservation, the aforementioned frozen sanctuaries present an avenue for salvation.
Sacred Nuggets of Wisdom: Baking Secrets Unveiled
- Tender handling begets tender biscuits! Approach the dough with the utmost tenderness, for each stroke and caress shall reverberate through the final creation, imparting a profound tenderness.
- In the absence of a circular cutter, fear not, for a knife shall serve as a worthy substitute. Let the dough transform into 8 to 10 square biscuits, showing how resourceful you are.
- The spectrum of biscuit texture awaits your command. If a preference for crisper perimeters permeates your being, indulge in the artistry of spacing the biscuits, allowing a gentle expanse between each glorious entity. Just remember that by accepting this preference, their progress might be a bit slower.
- Should the dough appear rather tepid subsequent to the cutting process, embrace the solution of placing the baking sheet within the sacred recesses of the freezer for a duration of ten minutes. This respite shall restore equilibrium, ensuring a harmonious communion between the dough and the oven’s fiery fervor.
Dear high school students, now you have the knowledge to make delicious buttermilk biscuits. May your hands create them with grace, leaving everyone amazed by their beauty and flavor.
Buttermilk Biscuits Recipe
Ingredients
- 2 cups all-purpose
- 1 tablespoon baking powder
- ¼ teaspoon baking soda
- 2 teaspoons sugar
- 1 teaspoon salt
- 6 tablespoons cold unsalted butter
- ¾ cup cold buttermilk
Instructions
- To begin, preheat the oven to 450°F (230°C). Then, place a generous sheet of parchment paper or a silicone baking mat onto a large baking sheet and set it aside for later use.
- In a generously sized mixing bowl, combine the flour, baking powder, baking soda, sugar, and salt. Use a whisk to thoroughly blend the dry ingredients together. Now, incorporate the cubed cold butter by cutting it into the mixture with a pastry cutter or utilizing a food processor if you prefer. Aim for small pea-sized pieces of butter. Next, slowly pour in the cold buttermilk while gently stirring the ingredients. The goal is to bring the dough together without overmixing.
- Taking a small scoop of the dough, place it on a surface lightly dusted with flour. Use your hands to gently bring the dough together. Flatten the dough into a rectangular shape and fold it into thirds, resembling a letter. Turn the dough, gathering any loose crumbs, and press it down to form another rectangle. Repeat this folding process two more times.
- The dough should be placed on a surface lightly dusted with flour, gently pressed down to form a rectangle that is approximately 1/2-inch thick (take the necessary measurements!). To create the biscuits, use a biscuit cutter that has been coated with flour and has a diameter of 2.5 inches. Be careful not to twist the cutter while cutting, simply press it straight down into the dough and lift it straight back up.
- To ensure the creation of 8 to 10 biscuits, continue gathering any leftover pieces of dough. Flatten it down to a thickness of about half an inch and proceed to cut it. It is advisable to maximize your effort during the initial attempt as the quality of the biscuits may decline with subsequent working of the dough.
- Arranging the biscuits on the baking sheet in close proximity to each other, ensure they are touching. A small amount of buttermilk should be brushed onto the top of each biscuit.
- The baking time should be around 15 to 17 minutes until a light golden brown color is achieved. Once done, removing the baked goods from the oven and optionally brushing them with melted butter would add a delightful touch. After allowing them to cool for a few minutes, they are ready to be served and enjoyed.